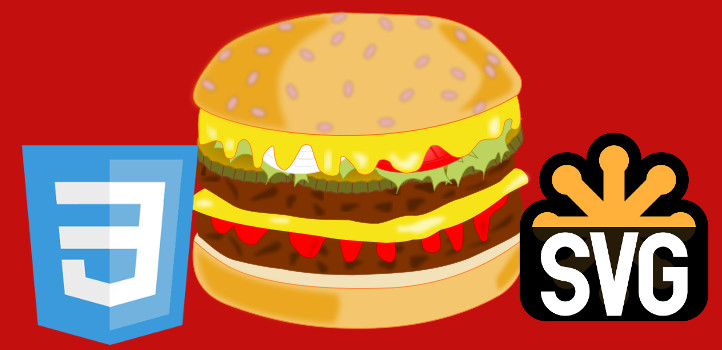
Tags:
CSS goes far beyond being just a styling language for HTML, allowing you to style any XML based language too. This includes SVG documents, which becomes a powerful tool for achieving some great affects without the use of JavaScript.
This experiment blends HTML and SVG to create a menu where you make your own burger by selecting what you want from the menu. To start things off (as I'm really not a great artist) I needed to source a burger image, ideally in the SVG format and free to use. The Open Clipart website is a great source for these requirements.
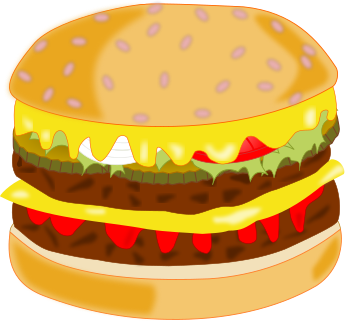
Preparing the Source Image
The original SVG was mostly perfect, and I didn't need to make any graphical changes to it. I did need to group and name the layers though, so that I could target them with CSS. Thankfully, Inkscape makes this a walk in the cake (or a piece of park), letting me set layer IDs easily.
As an aside; normally I'd always look to style by class and not ID, but Inkscape doesn't offer the ability to set classes easily on an element out of the box, although it is possible via the built in XML editor.
Setting the Initial Appearance
The first thing is to hide all of the extra parts that we want to make options on the burger. This is done with the following CSS:
#seeds,
#onion,
#lettuce,
#tomato,
#gherkins,
#cheese_2,
#cheese_1,
#ketchup,
#patty_1 {
	display: none;
}
Another note, the reason why only #patty_1 is listed here rather than #patty_2, is because I originally began naming layers from the bottom up to preserve the layer order (so that the bottom burger bun didn't appear above the contents, for example). Thus, the bottom patty on the image actually became #patty_1.
The next step was to set the start position for each part of the burger, as ingredients will take up space, so naturally their absence would mean that the entire burger is smaller.
#patty_2 {
	transform: translate(0, -105px);
}
#gherkins {
	transform: translate(0, -60px);
}
#onion {
	transform: translate(0, -40px);
}
#tomato {
	transform: translate(-350px, -110px);
}
#cheese_1 {
	transform: translate(0, -55px);
}
#ketchup {
	transform: translate(0, -150px);
}
#patty_1 {
	transform: translate(0, -150px);
}
#bottom_bun {
	transform: translate(0, -220px);
}
Showing Toppings
In order to allow a user to pick toppings, I'm relying on the classic checkbox hack. Each menu item is a <label> element pointing to a checkbox in the same document level as the SVG. This allows me to use the ~ general sibling selector to chain the checkboxes to the SVG elements they are intended to control.
.seeds:checked ~ svg #seeds,
.onion:checked ~ svg #onion,
.lettuce:checked ~ svg #lettuce,
.tomato:checked ~ svg #tomato,
.gherkins:checked ~ svg #gherkins,
.cheese:checked ~ svg #cheese_2,
.cheese:checked ~ .extra_cheese:checked ~ svg #cheese_1,
.ketchup:checked ~ svg #ketchup,
.extra_patty:checked ~ svg #patty_1 {
	display: block;
}
The Document Layout
In order for the sibling selectors to work, the checkboxes and embedded SVG needed to be in the same level with the same parent node. This is why the above selectors include the svg tag, because that's effectively the sibling, and the SVG nodes are children of that sibling.
<input type="checkbox" class="state_checkbox seeds" id="add_seeds"/>
<input type="checkbox" class="state_checkbox onion" id="add_onion"/>
<input type="checkbox" class="state_checkbox lettuce" id="add_lettuce"/>
<input type="checkbox" class="state_checkbox tomato" id="add_tomato"/>
<input type="checkbox" class="state_checkbox gherkins" id="add_gherkins"/>
<input type="checkbox" class="state_checkbox cheese" id="add_cheese"/>
<input type="checkbox" class="state_checkbox extra_cheese" id="add_extra_cheese"/>
<input type="checkbox" class="state_checkbox ketchup" id="add_ketchup"/>
<input type="checkbox" class="state_checkbox extra_patty" id="add_extra_patty"/>

<section class="burger_menu">
	<h3>Build Your Burger</h3>

	<fieldset>
		<legend>Basics</legend>

		<label for="add_seeds" class="seeds_label">Seeded bun</label>
		<label for="add_extra_patty" class="extra_patty_label">Extra Patty</label>
	</fieldset>

	<fieldset>
		<legend>Toppings</legend>

		<label for="add_onion" class="onion_label">Onion</label>
		<label for="add_lettuce" class="lettuce_label">Lettuce</label>
		<label for="add_tomato" class="tomato_label">Tomato</label>
		<label for="add_gherkins" class="gherkins_label">Gherkins</label>
		<label for="add_cheese" class="cheese_label">Cheese</label>
		<label for="add_extra_cheese" class="extra_cheese_label">Extra Cheese</label>
		<label for="add_ketchup" class="ketchup_label">Ketchup</label>
	</fieldset>
</section>

<svg
...
Positioning the Burger Parts
The complicated part (or incredibly time consuming part) of the whole experiment was setting the correct position of elements based on other elements which might also be shown. For example, if either the gherkins or the cheese has been added to the burger, then the patty will be pushed down to accommodate for the extra space that's needed (all based on the starting position of each layer as above).
.cheese:checked ~ svg #patty_2,
.gherkins:checked ~ svg #patty_2 {
	transform: translate(0, -67px);
}
Some of the positioning styles are a little bit more complicated. For example, if the gherkins and cheese are added, or both cheese layers, then the ketchup gets pushed down:
.gherkins:checked ~ .cheese:checked ~ svg #ketchup,
.cheese:checked ~ .extra_cheese:checked ~ svg #ketchup {
	transform: translate(0, -40px);
}
One assumption I took here was the order of the checkboxes. If the checkbox order was uncertain, it would make the CSS a lot more complicated. The above example would become something like this:
.gherkins:checked ~ .cheese:checked ~ svg #ketchup,
.cheese:checked ~ .gherkins:checked ~ svg #ketchup,
.cheese:checked ~ .extra_cheese:checked ~ svg #ketchup,
.extra_cheese:checked ~ .cheese:checked ~ svg #ketchup {
	transform: translate(0, -40px);
}
For selectors matching 3 burger components, the single line of CSS currently would become 3, to account for all combinations. That's on top of the combinations required for each different ingredient being shown at different times. The resulting mess would become unmanageable and definitely not suited to a CSS solution (even this example is pushing the complexity boundaries!)
The Complete Menu
The final result is this, all achieved with CSS and no JavaScript:
Comments